The ‘soap opera effect’ is just the tip of the iceberg; your 4K TV’s failure to deliver a cinematic experience is a system-wide problem, not a single setting you can toggle.
- The physical limitations of your TV’s panel technology and the acoustic flaws of your room fundamentally compromise the director’s intended image and sound.
- True immersion is driven more by the psychoacoustic power of dynamic, spatial audio than by screen size or pixel count alone.
- Your home network’s stability, from internal traffic prioritization to your ISP’s external peering agreements, dictates the integrity of the 4K signal before it ever reaches your screen.
Recommendation: Stop hunting for the ‘perfect’ picture mode and start thinking like a professional calibrator. Adopt a holistic approach that optimizes your entire home theater ecosystem—the display, the room, the sound, and the network—to honor the original creative intent.
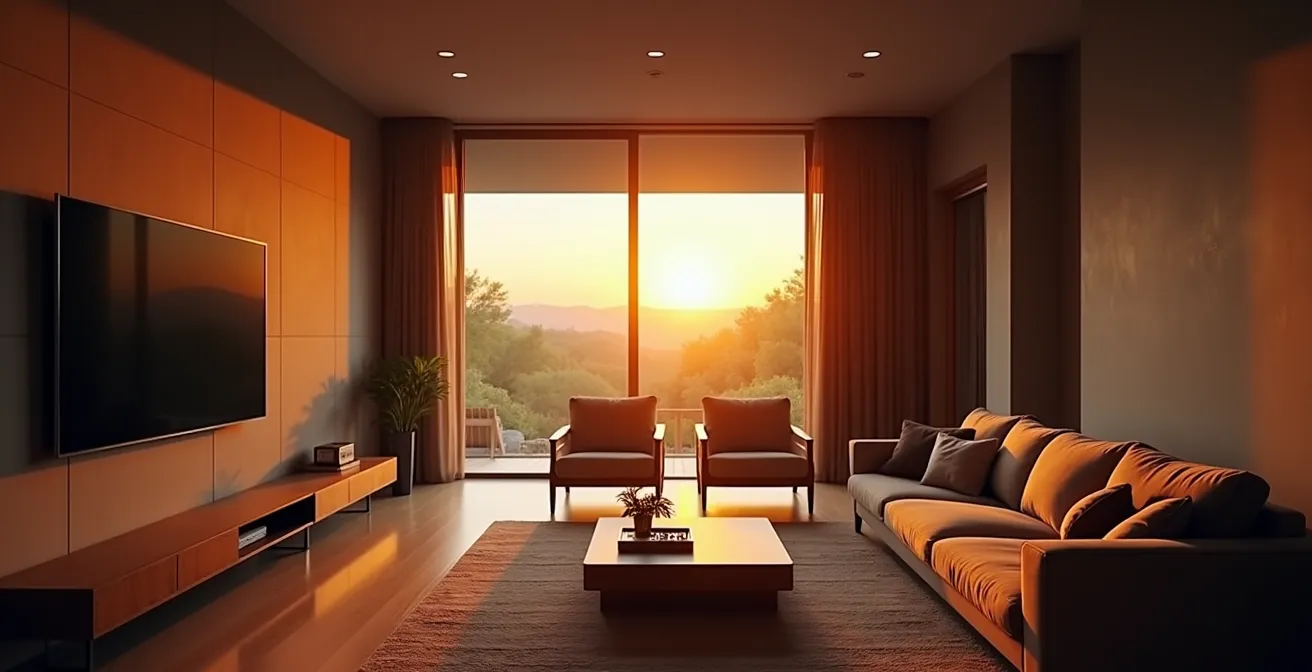
You’ve invested a significant sum into a state-of-the-art 4K television. You unbox it, marvel at its razor-thin profile, and queue up a critically acclaimed blockbuster. But as the opening scene unfolds, a sense of disappointment creeps in. The image is jarringly smooth, character movements feel unnatural, and the deep, inky shadows of the cinema are replaced by a cloudy, distracting grey. It doesn’t look like a movie; it looks like a daytime soap opera shot on a cheap camcorder. This frustrating disconnect between a high-end purchase and a subpar experience is a common complaint among home theater enthusiasts.
The conventional wisdom rushes in with quick fixes. “Turn off motion smoothing,” they say. “Switch to ‘Filmmaker Mode’ or ‘Cinema’ preset.” You’ve diligently followed this advice, disabling every processing feature with “Dynamic,” “Enhanced,” or “Motion” in its name. While this helps, the fundamental magic of the cinema—the deep contrast, the enveloping sound, the stable, filmic texture—remains elusive. The problem is that you’ve been led to believe the issue lies within a single settings menu, when in reality, the battle for cinematic immersion is fought across your entire home ecosystem.
The truth is, your setup is likely failing to honor the director’s creative intent. This failure isn’t due to one wrong setting but a series of technical mismatches between professional production standards and the consumer environment. Achieving a true cinematic feel requires a holistic understanding, viewing your home theater not as a TV, but as an interconnected system. It’s about calibrating the environment, ensuring signal chain integrity from the server to your screen, and respecting the foundational principles of light and sound reproduction.
This guide will deconstruct the problem layer by layer, moving beyond simple menu tweaks. We will analyze the core hardware, the acoustics of your space, the science of viewer perception, and the often-overlooked network infrastructure that underpins the entire experience. By the end, you will understand why your TV fails and possess the expert knowledge to begin a true calibration process.
To navigate this complex topic, we have structured this analysis into distinct areas of focus. The following table of contents outlines the journey from the core panel technology of your display to the intricacies of your internet connection, providing a complete system-level diagnostic.
Summary: Why Your 4K TV Still Doesn’t Look Like the Movies?
- OLED vs. QLED: Which Panel Technology Creates True Black Levels?
- How to Position 5.1 Speakers for Perfect Surround Sound in a Square Room?
- The Eye Strain Headache That Ruins Your Movie Marathon and How to Fix It
- How to Make 1080p Content Look Sharp on a 4K Screen?
- Why Sound Quality Matters More Than Screen Size for Immersion?
- IMAX vs. Dolby Cinema: Which Premium Format Is Worth the Extra $10?
- How to Prioritize Your TV’s Traffic on Your Router for Lag-Free 4K?
- Why Your 100mbps Connection Still Buffers on Friday Nights?
OLED vs. QLED: Which Panel Technology Creates True Black Levels?
The absolute foundation of a cinematic image is contrast ratio—specifically, the ability to produce a true, deep black. Without it, scenes meant to be dark and atmospheric become a milky, washed-out grey, instantly shattering immersion. This is not a settings issue; it’s a fundamental difference in how your TV’s panel technology controls light. The two dominant technologies, OLED and QLED, approach this in fundamentally opposite ways, and choosing the right one for your viewing environment is the first step in calibration.
QLED (Quantum-dot Light Emitting Diode) TVs are, at their core, advanced LCD panels. They use a powerful LED backlight that shines through a liquid crystal layer and a quantum dot filter to produce color. While they can achieve incredible peak brightness, ideal for well-lit rooms, their backlight system is their Achilles’ heel for cinema. Even with advanced ‘local dimming’ zones, the light from the backlight inevitably bleeds into the black areas of the screen, a phenomenon known as ‘blooming’ or ‘halo effect’. This prevents the panel from ever achieving true black.
OLED (Organic Light Emitting Diode) technology, by contrast, requires no backlight. Each of the 8.3 million pixels in a 4K OLED screen is self-emissive; it can be turned on or completely off independently. When a pixel is off, it emits no light, creating a perfect, infinite black. This per-pixel light control is the holy grail for reproducing cinematic content, allowing for breathtaking contrast and detail in shadows that QLEDs simply cannot match. This is crucial for honoring the director’s creative intent, especially in genres like sci-fi, horror, or film noir.
The choice becomes a matter of calibrating the technology to the environment. As a case in point, consider the experience of a film enthusiast named Mark who upgraded his dedicated basement theater. A direct comparison in his light-controlled environment revealed OLED’s superiority. According to an analysis of his home theater upgrade, the per-pixel control of his OLED display delivered a profoundly more immersive, film-accurate experience for dark cinematic content, whereas a QLED alternative, while bright, couldn’t replicate the same depth and fidelity in the shadows.
For a dedicated, dark home theater, OLED is technically superior for cinematic reproduction. For a bright, multi-purpose living room where daytime sports are as common as nighttime movies, a high-end QLED may be a more practical, albeit compromised, choice.
How to Position 5.1 Speakers for Perfect Surround Sound in a Square Room?
Once the visual foundation is set, the next critical layer of immersion is audio. A technically perfect image paired with poor sound results in a flat, unengaging experience. The challenge is that sound is profoundly affected by the geometry of your room, and a perfect square is an acoustical worst-case scenario. Its parallel walls create a perfect storm of sonic problems, including standing waves and flutter echo, which can turn a high-end audio system into a muddy, incoherent mess.
Standing waves occur when a sound wave’s length is equal to the room’s dimension. In a square room, the length and width modes combine, creating significant peaks and nulls in bass response at specific locations. This means you might have overwhelming, boomy bass in one seat and almost none a few feet away. Flutter echo is a high-frequency ringing or buzzing sound caused by sound waves rapidly bouncing back and forth between the parallel walls. These issues destroy the spatial clarity and detail required for an immersive 5.1 surround experience, where the goal is to create a seamless, 360-degree sound field.
Correct calibration in such a space is less about the speaker brand and more about precise positioning and acoustic treatment. The goal is to break up the room’s symmetry. Avoid placing your primary listening position in the dead center of the room or at 50% of its length, as this is where standing waves are most problematic. A common professional guideline is the 38% rule, positioning the main seat 38% of the room’s length from the front wall. Furthermore, your front left and right speakers should form an equilateral triangle with the listening position, each angled at 30 degrees from the center channel. Surround speakers in a 5.1 setup should be placed at 90-110 degrees to the side of the listener, slightly behind them, to create that enveloping effect.
However, speaker placement alone is not enough. You must combat the room’s inherent flaws with acoustic treatment. This involves using absorption panels at first reflection points (the spots on the side walls where sound from the front speakers would bounce to reach your ears) and, most importantly, placing bass traps in the corners to tame the low-frequency buildup. The following table breaks down these common square-room issues and their technical solutions, which are essential for any serious environmental calibration.
The challenges of a square room are significant, but they can be systematically addressed. An expert guide to room setup confirms that a combination of precise placement and targeted acoustic treatment is non-negotiable for achieving clear, immersive sound in a compromised space.
| Challenge | Impact | Solution |
|---|---|---|
| Standing Waves | Bass buildup at room modes | Place bass traps in corners, avoid 50% room positions |
| Flutter Echo | High-frequency ringing between parallel walls | Add absorption panels at first reflection points |
| SBIR (Speaker Boundary Interference) | Comb filtering from wall reflections | Position speakers <1ft or >3ft from boundaries |
| Room Modes | Uneven bass response | Use multiple subwoofers for uniform coverage |
Ultimately, treating the room as a component of the audio system is a core tenet of professional calibration. It transforms the listening experience from a chaotic reflection of sound into a controlled, deliberate soundscape that honors the film’s original audio mix.
The Eye Strain Headache That Ruins Your Movie Marathon and How to Fix It
You’ve achieved perfect blacks and calibrated your sound, yet an hour into a movie, you feel a familiar, dull headache creeping in. Your eyes feel tired, and you find yourself squinting during dark scenes. This physical discomfort, often dismissed as fatigue, is a direct result of a technical mismatch between your TV’s bright-to-dark transitions and your eyes’ biological response. Watching a bright screen in a pitch-black room forces your irises to constantly and rapidly adjust, leading to significant eye strain and ruining any chance of long-term immersion.
The solution is not to turn up the room lights, which would wash out the screen and destroy the contrast you worked so hard to achieve with your OLED. The professional solution is a precisely calibrated bias light. This is a strip of neutral white light placed behind the television that projects a soft glow onto the wall. Its purpose is to provide a gentle, constant reference of ambient light for your eyes, which reduces the perceived contrast between the brightest parts of the screen and the dark surrounding wall. This allows your pupils to remain more relaxed and stable, dramatically reducing eye strain without compromising the on-screen image.
This illustration demonstrates the ideal effect: a soft, uniform halo of light that surrounds the display, providing a neutral reference point for the viewer’s eyes without creating glare or washing out the on-screen image.

However, not just any LED strip will do. A cheap, uncalibrated blue or multi-colored light will contaminate the on-screen colors and introduce its own distractions. A true bias light must be calibrated to the D65 white point (6500K color temperature), the same standard used by filmmakers in editing suites. According to a technical guide on 4K TV picture settings, this ensures the ambient light is perfectly neutral and won’t skew your perception of the on-screen colors. The brightness is also critical; it should be set to approximately 10% of your TV’s maximum white output—just enough to relieve strain, but not so much that it lifts the perceived black levels of the screen. A high Color Rendering Index (CRI) above 90 is also essential for accurate color matching.
Action Plan: Implementing a Professional Bias Lighting System
- Install LED strips with a specified 6500K color temperature behind your TV to match the D65 industry-standard white point.
- Verify that the LEDs have a Color Rendering Index (CRI) above 90 to ensure the light is neutral and won’t distort on-screen colors.
- Adjust the bias light’s brightness to approximately 10% of your TV’s peak white output, creating a soft halo rather than a bright spotlight.
- Position the lights to generate a uniform, even glow around the television, ensuring no individual diodes are directly visible to the viewer.
- Fine-tune your TV’s HDR settings, such as reducing ‘Dynamic Tone Mapping’, to work in concert with the bias light and prevent overly aggressive brightness shifts.
By managing the viewing environment to support your own biology, you move beyond simple picture settings and into the realm of true human-centric home theater design, ensuring comfort for even the longest movie marathons.
How to Make 1080p Content Look Sharp on a 4K Screen?
A significant portion of the content we watch, from older Blu-rays to the majority of cable TV and many streaming services, is not native 4K. It’s typically 1080p or even lower resolution. When this content is displayed on a 4K screen, your television’s internal processor must perform ‘upscaling’—intelligently inventing the extra 6.2 million pixels needed to fill the screen. The quality of this process is a critical, and often overlooked, factor in perceived sharpness. A cheap, basic upscaler simply quadruples pixels, resulting in a soft, blurry, and artifact-ridden image. This is a failure in the signal chain integrity.
High-end televisions from manufacturers like Sony, LG, and Samsung invest heavily in sophisticated, AI-enhanced processing chips. These processors, like Sony’s Cognitive Processor XR, don’t just multiply pixels. They analyze the image in real-time, cross-referencing objects and textures with a vast internal database to intelligently recreate detail, reduce noise, and sharpen edges without introducing artificial-looking halos. A superior processor can make a high-quality 1080p source look nearly indistinguishable from native 4K at a normal viewing distance.
However, the processor can only work with the data it’s given. This is where the concept of ‘bitrate starvation’ comes into play. The bitrate is the amount of data used to encode a second of video. A 1080p Blu-ray might have a healthy bitrate of 30-40 Mbps, providing the upscaling processor with a wealth of information to work with. In contrast, a 1080p stream from a service trying to conserve bandwidth might be compressed down to 5-8 Mbps. As professional video forums confirm, this massive data gap is why a 1080p Blu-ray disc almost always looks sharper on your 4K TV than a 1080p stream. The upscaler has less data to analyze, leading to more compression artifacts, blockiness in motion, and a generally softer image.
Optimizing for lower-resolution content often requires switching picture presets. For instance, testing of Sony’s Bravia XR processor has shown that while a ‘Professional’ preset is ideal for pristine 4K HDR sources, switching to a ‘Cinema’ preset for lower-resolution content can improve perceived brightness and clarity. This demonstrates that there is no single ‘set and forget’ mode; a true calibrator adapts the TV’s settings to the quality of the source material. It’s about giving your TV’s processor the best possible chance to succeed with the signal it receives.
Therefore, judging a TV’s sharpness based on a compressed stream is a flawed test. To truly evaluate your TV’s upscaling capability, you must feed it a high-bitrate source, demonstrating that the problem often lies further up the signal chain than the display itself.
Why Sound Quality Matters More Than Screen Size for Immersion?
In the pursuit of a cinematic experience, enthusiasts often obsess over screen size, chasing an ever-larger panel to fill their field of view. While a large screen is impactful, this focus betrays a fundamental misunderstanding of human perception. From a technical and biological standpoint, audio is a far more powerful tool for creating genuine, visceral immersion than visuals alone. The difference lies in the nature of our senses: sight is directional, but hearing is omnidirectional and deeply wired into our primal survival instincts.
This principle is expertly articulated by the renowned psychoacoustician Floyd Toole. In his foundational work, he explains the deep-seated power of our auditory sense:
Our hearing is a 360-degree, primal survival sense that creates spatial awareness. A sound from behind is more viscerally startling and immersive than a slightly larger image in front of us.
– Floyd Toole, Sound Reproduction: The Acoustics and Psychoacoustics of Loudspeakers and Rooms
This is the core of psychoacoustics. A film’s sound mix is designed to build a three-dimensional world that extends far beyond the edges of the screen. The subtle creak of a floorboard behind you, the faint whisper in the rear-right channel, or the roar of a jet engine flying overhead—these are the cues that trick our brains into believing we are *inside* the environment, not merely watching it. A large screen can show you a monster, but a well-calibrated audio system can make you feel it breathing down your neck.
The pathetic, downward-firing 10-watt speakers built into even the most expensive flat-panel TVs are incapable of this feat. They lack the power and physical design to reproduce the vast dynamic range—the difference between the quietest whisper and the loudest explosion—of a modern film soundtrack. As Stereophile’s testing reveals, a dedicated AV system can achieve a 100dB+ range, delivering explosive impact and subtle nuance that TV speakers compress into a flat, lifeless mono-like presentation. A dedicated surround sound system isn’t a luxury; it is a technical necessity for recreating the audio portion of the director’s creative intent.
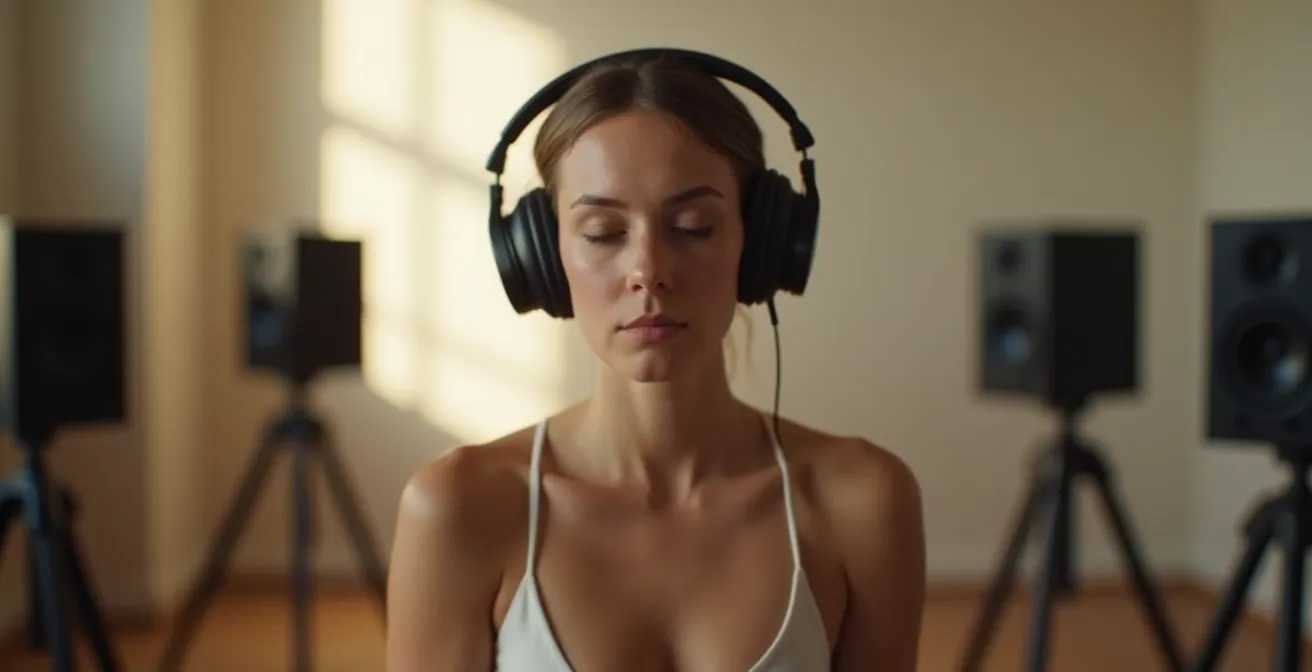
The image above captures the essence of an immersive audio experience. It’s not about visible hardware, but about creating an invisible, enveloping sound field that transports the listener, tapping into that primal, 360-degree sense of awareness.
Consequently, a 65-inch OLED with a properly calibrated 5.1.2 Dolby Atmos system will always feel more cinematic and immersive than a 85-inch QLED using its built-in speakers. The former builds a world; the latter merely displays a window.
IMAX vs. Dolby Cinema: Which Premium Format Is Worth the Extra $10?
To perfect a home setup, it is instructive to study the gold standard: the premium large format (PLF) commercial cinema. When you pay extra for a ticket, you’re not just buying a bigger screen; you’re buying into a meticulously calibrated, end-to-end ecosystem. The two dominant players, IMAX and Dolby Cinema, represent different philosophies of cinematic presentation, and understanding their technical differences provides a masterclass in what “creative intent” truly means.
IMAX’s philosophy is rooted in the camera. Its primary focus is on capturing and presenting an image with a massive amount of vertical information. When a director like Christopher Nolan or Denis Villeneuve chooses to film with IMAX cameras, they are composing for the unique, tall aspect ratio (often 1.90:1 or even 1.43:1) that fills your entire vertical field of view. Watching these specific films in a true IMAX theater is the only way to see the complete picture as the director intended. However, for films not shot with IMAX cameras, the format’s benefit is reduced to its large screen and powerful, but channel-based, 12-channel sound system.
Dolby Cinema, on the other hand, is a post-production philosophy focused on presentation fidelity. Its ecosystem is designed to be the most accurate possible vessel for *any* film, regardless of how it was shot. It achieves this with a proprietary dual-laser projection system capable of a 1,000,000:1 contrast ratio, delivering the same perfect blacks and vibrant HDR highlights as a high-end OLED TV. This visual prowess is paired with Dolby Atmos, an object-based audio system. Instead of mixing sound to a fixed number of channels, Atmos allows filmmakers to place sounds as individual “objects” in a 3D space, which are then rendered in real-time by the specific speaker layout of the theater, creating an incredibly precise and enveloping soundscape.
The choice between them depends entirely on the film itself. For a movie explicitly “Shot with IMAX cameras,” IMAX is often the definitive experience for scale and scope. For virtually any other film, particularly those with complex dark scenes or nuanced color grading, Dolby Cinema offers superior contrast, color fidelity, and more precise audio. The following table summarizes the core technical distinctions.
This comparison highlights that each format is a tool designed to serve a specific artistic vision. Understanding this helps you make an informed choice at the multiplex, which in turn educates your expectations for what is possible at home.
| Feature | IMAX | Dolby Cinema |
|---|---|---|
| Primary Focus | Camera’s canvas – vertical information | Post-production fidelity |
| Best For | Films shot with IMAX cameras (Nolan, Villeneuve) | Any film – maximum color/contrast fidelity |
| Screen Technology | Large format projection | Dual laser projectors with perfect blacks |
| Audio | Proprietary 12-channel sound | Dolby Atmos object-based audio |
| Typical Premium | $5-10 extra | $5-10 extra |
Ultimately, both formats underscore a crucial lesson for the home enthusiast: the best experience is one that is holistically engineered and calibrated to faithfully reproduce the source material. It’s a system, not just a screen.
How to Prioritize Your TV’s Traffic on Your Router for Lag-Free 4K?
Your home theater’s signal chain doesn’t begin at the Blu-ray player or the TV’s antenna; for modern viewing, it begins at your internet router. A pristine 4K HDR stream from Netflix or Disney+ is a data-intensive signal that is highly susceptible to network congestion. Even with a fast internet plan, your TV is competing for bandwidth with every other connected device in your home—laptops, phones, smart speakers, and security cameras. When someone else starts a video call or a large download, your movie can be the first victim, resulting in buffering, resolution drops, and a complete breakdown of immersion.
To guarantee signal chain integrity, you must take control of your local network. This is achieved through your router’s Quality of Service (QoS) settings. QoS is a feature that allows you to instruct your router to prioritize traffic for specific devices or applications. By configuring QoS, you can create a virtual “express lane” for your smart TV or streaming device, ensuring it always gets the bandwidth it needs for an uninterrupted 4K stream, even when the rest of the network is busy.
The process involves accessing your router’s administrative panel via a web browser and locating the QoS or “Traffic Control” section. From there, you can create a rule that identifies your TV by its unique MAC address (a hardware identifier found in the TV’s network settings) and assigns it the highest priority level. As a baseline, streaming platforms specify that 4K streaming requires a consistent 25 Mbps minimum, with some services like YouTube TV recommending 40 Mbps for maximum reliability. You should therefore allocate at least this much guaranteed bandwidth to your TV in the QoS settings.
For the ultimate in stability, a wired Ethernet connection from your router to your TV is always technically superior to Wi-Fi. A wired connection is immune to the wireless interference and signal drops that can plague even the best Wi-Fi networks, providing near-zero packet loss. If a wired connection is not feasible, creating a dedicated 5GHz Wi-Fi network (SSID) exclusively for your streaming devices can also significantly reduce interference from other household gadgets that typically operate on the more crowded 2.4GHz band.
By implementing these network calibration techniques, you are treating your data stream with the same importance as your audio and video signals, ensuring the pristine 4K source arrives at your TV intact and ready for display.
Key Takeaways
- True cinematic black levels, the foundation of a good image, are only achievable through self-emissive panel technologies like OLED, which offer per-pixel light control.
- An enveloping, 3D soundscape is more critical for visceral immersion than screen size. Your brain is hardwired to react more strongly to spatial audio cues.
- The entire signal chain must be protected. A high-quality image is meaningless if it’s degraded by source compression (low bitrate) or local network congestion before it even reaches the display.
Why Your 100mbps Connection Still Buffers on Friday Nights?
You’ve done everything right. You have a fast internet plan, a high-end router with QoS enabled, and your TV is connected via Ethernet. Yet, on a Friday night, at the peak of streaming primetime, your 4K movie grinds to a halt, stuck on a perpetual buffering wheel. The frustration is immense because you’ve eliminated every variable within your own home. The problem, it turns out, often lies completely outside your control, in the invisible and complex world of internet infrastructure and peering agreements.
The 100 Mbps (or more) that you pay for is the speed of the connection between your home and your Internet Service Provider (ISP). Think of it as your local street. However, the data for your Netflix stream isn’t stored at your ISP; it’s on a server hundreds or thousands of miles away. For that data to reach you, it must travel across the “internet backbone”—a series of major data highways connecting different networks. The connection points between your ISP’s network and major content networks like Netflix, Google (YouTube), or Amazon are called peering points. On a Friday night, these digital highways can become just as congested as a real-world freeway during rush hour.
A network engineering expert provides the perfect analogy for this common bottleneck:
Your 100Mbps is the speed of your local street, but the Friday night traffic jam is on the main highway between your ISP and Netflix. If their peering agreement is weak, that highway gets congested, and everyone slows down.
– Network Engineering Expert, Digital Trends Home Theater Analysis
If your ISP has a poor or under-provisioned peering arrangement with a content provider, that connection becomes a bottleneck for all of its customers trying to access that service. Your 100 Mbps connection is effectively waiting in line behind thousands of others to get onto the content highway. This is why you might have no issues browsing the web (which uses different routes) while Netflix is unwatchable. While you cannot directly fix these peering issues, you can sometimes work around them. Switching your device’s DNS server from your ISP’s default to a public one like Cloudflare (1.1.1.1) or Google (8.8.8.8) can sometimes result in a more efficient initial connection path. Some tech-savvy users even employ specific VPNs that are optimized to route traffic around known points of congestion.
Stop tweaking individual settings and start thinking like a calibrator. Your journey to true cinematic immersion doesn’t end in a settings menu; it begins with a holistic audit of your entire home theater ecosystem, from the panel to the peering point. Evaluate your system as a whole to finally achieve the experience you paid for.